Deploying Nodejs app by using Jenkins Master & Jenkins Agent - Declarative Format

Jenkins Master (Server)
Jenkins’s server or master node holds all key configurations. Jenkins master server is like a control server that orchestrates all the workflow defined in the pipelines. For example, scheduling a job, monitoring the jobs, etc.
Jenkins Agent
An agent is typically a machine or container that connects to a Jenkins master and this agent that actually execute all the steps mentioned in a Job. When you create a Jenkins job, you have to assign an agent to it. Every agent has a label as a unique identifier.
When you trigger a Jenkins job from the master, the actual execution happens on the agent node that is configured in the job.
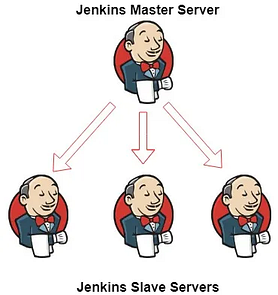
A single, monolithic Jenkins installation can work great for a small team with a relatively small number of projects. As your needs grow, however, it often becomes necessary to scale up. Jenkins provides a way to do this called “master to agent connection.” Instead of serving the Jenkins UI and running build jobs all on a single system, you can provide Jenkins with agents to handle the execution of jobs while the master serves the Jenkins UI and acts as a control node.
Pre-requisites
Let’s say we’re starting with a fresh Ubuntu 22.04 Linux installation. To get an agent working make sure you install Java ( same version as jenkins master server ) and Docker on it.
Note:- While creating an agent, be sure to separate rights, permissions, and ownership for jenkins users.
Task-01
Create an agent by setting up a node on Jenkins
Create a new AWS EC2 Instance and connect it to master(Where Jenkins is installed)
The connection of master and agent requires SSH and the public-private key pair exchange.
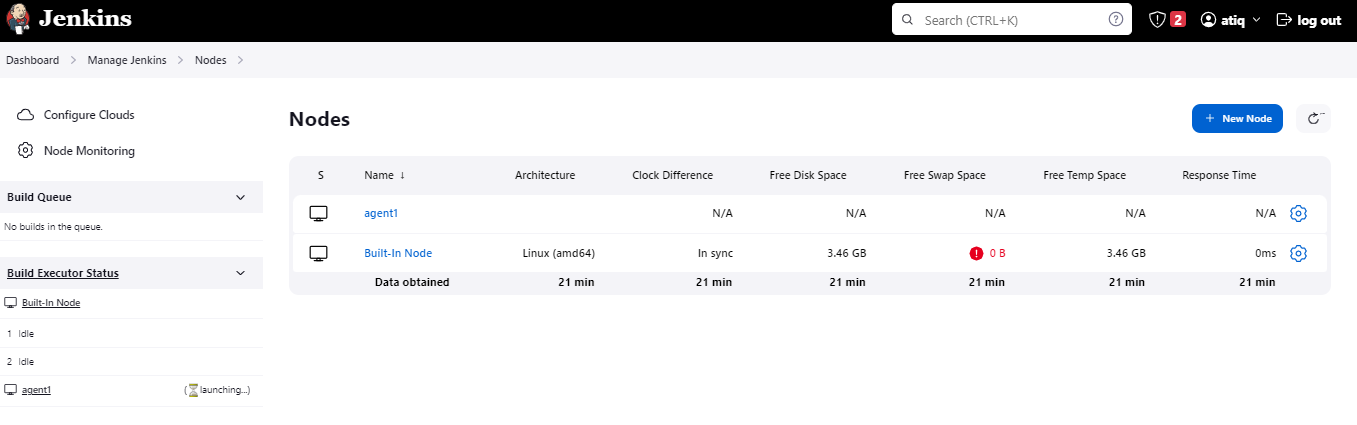
Verify its status under "Nodes" section.
Steps:
1)Create 2 EC2 instances for master and agent
Make new EC2 instances which will be treated as a “Master” and "Agent" While creating EC2 instance, you need to install jenkins and java too.
1.Jenkins-master:
2.Jenkins-agent
In 'jenkins-agent' instance install jenkins, docker.
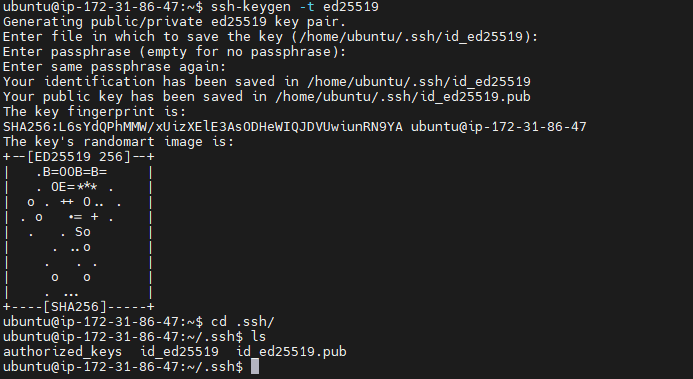
2)Generate SSH keys on “Jenkins-master” EC2 instance
Add public key from “Jenkins-master” instance to “Jenkins-agent” instance under location “.ssh/authorized_keys”
jenkins-agent instance:

Check Connection between Master & Agent
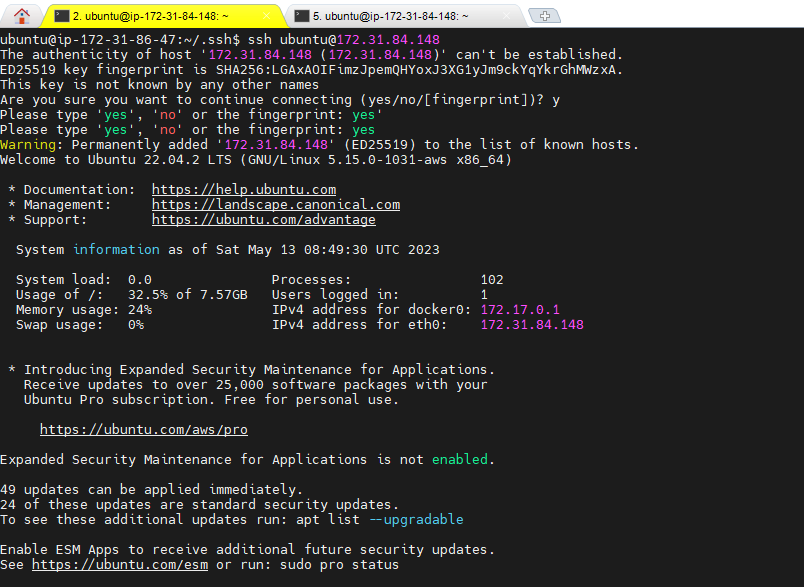
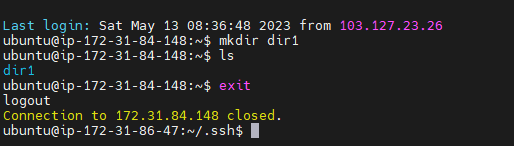
Connected Successfully..
3)Create an agent by setting up a node on Jenkins
Go to the Jenkins dashboard, and click on “Manage Jenkins” then
Click on “Manage Nodes and Clouds”
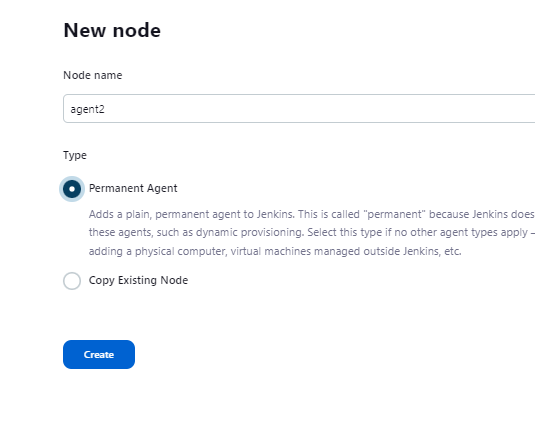
To create a node click on "New Node" on left side
Create your agent.
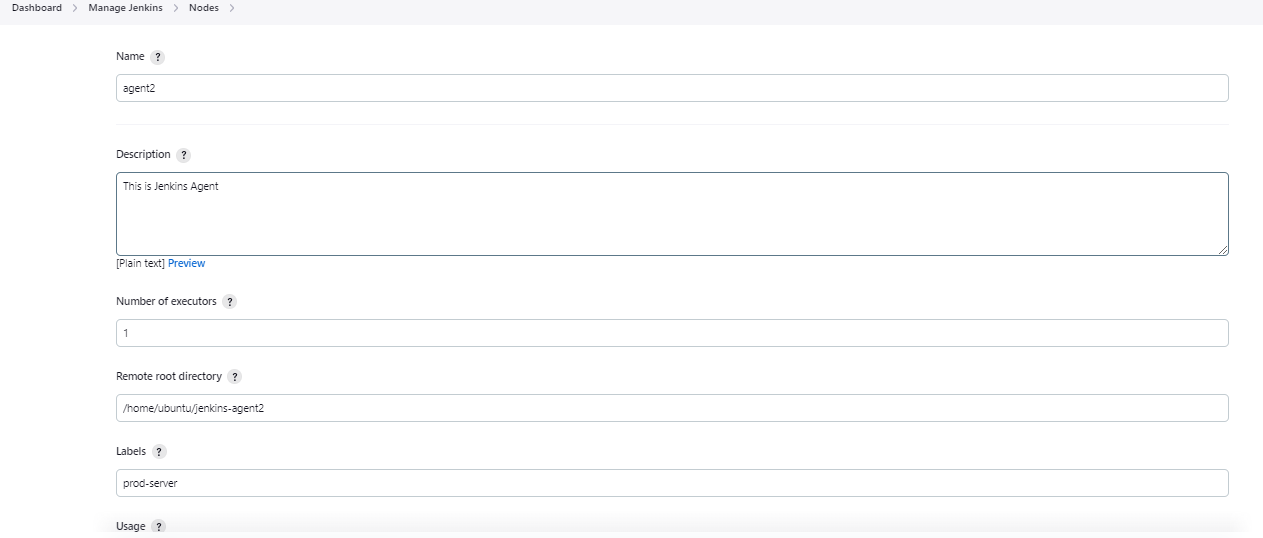
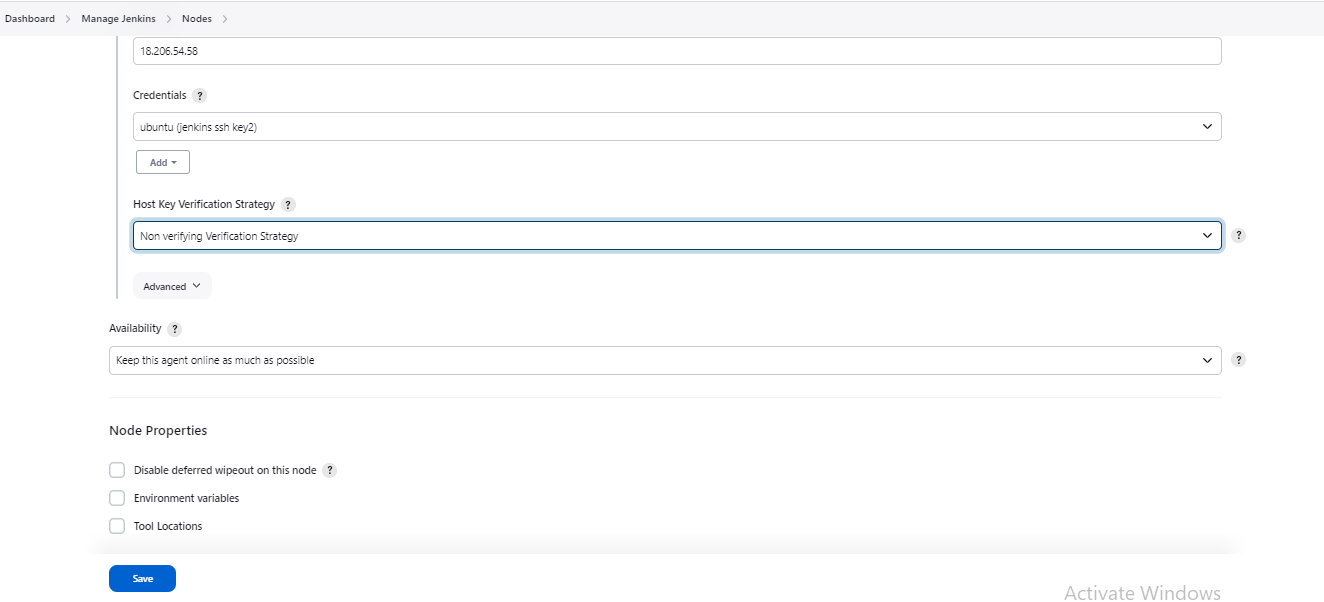
Add details of your node, accordingly.
Select launch method as “Launch agents via SSH”. Give public IP of agent in the host field.
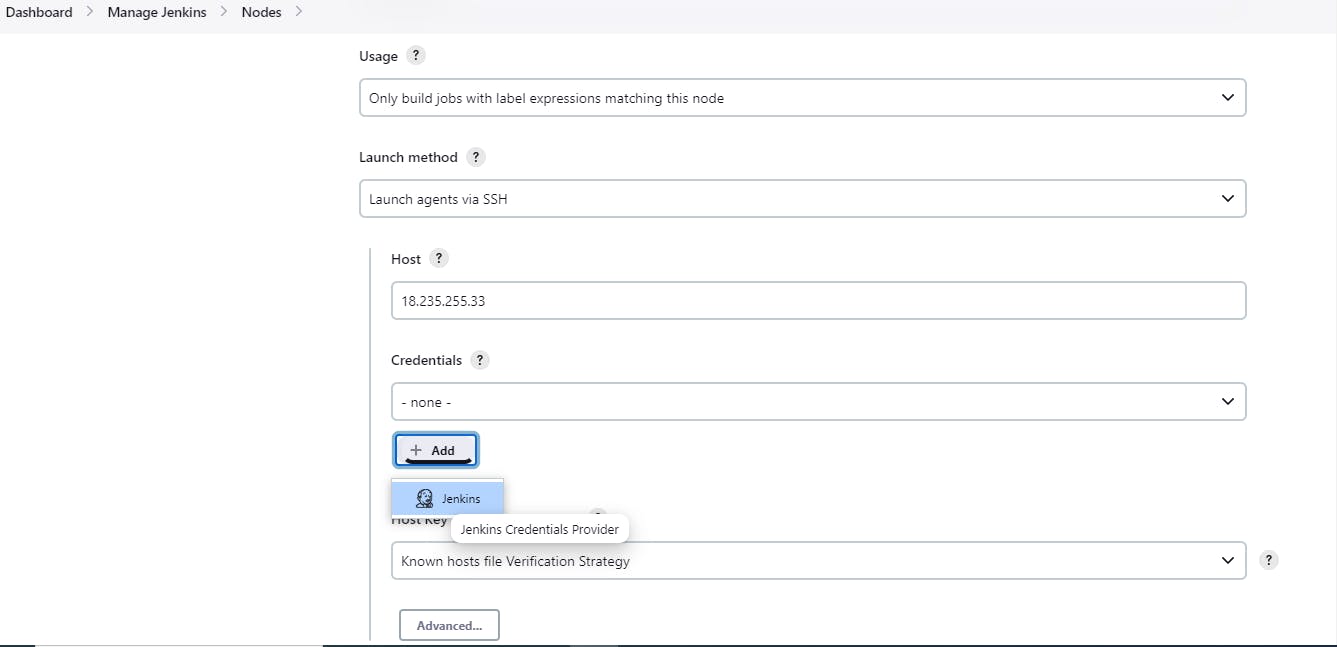
Click on “Add” under Credentials.
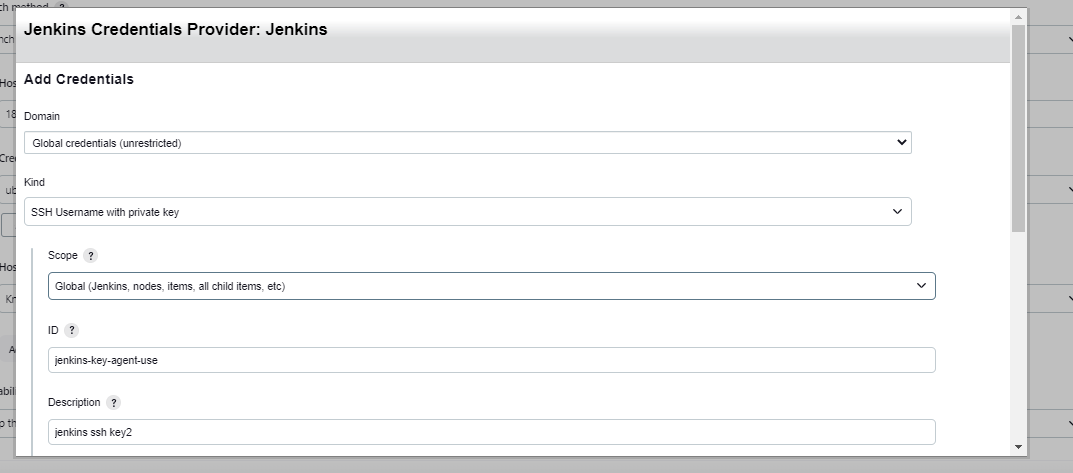
Add private key that we created in 'jenkins-master' instance using ssh-keygen.
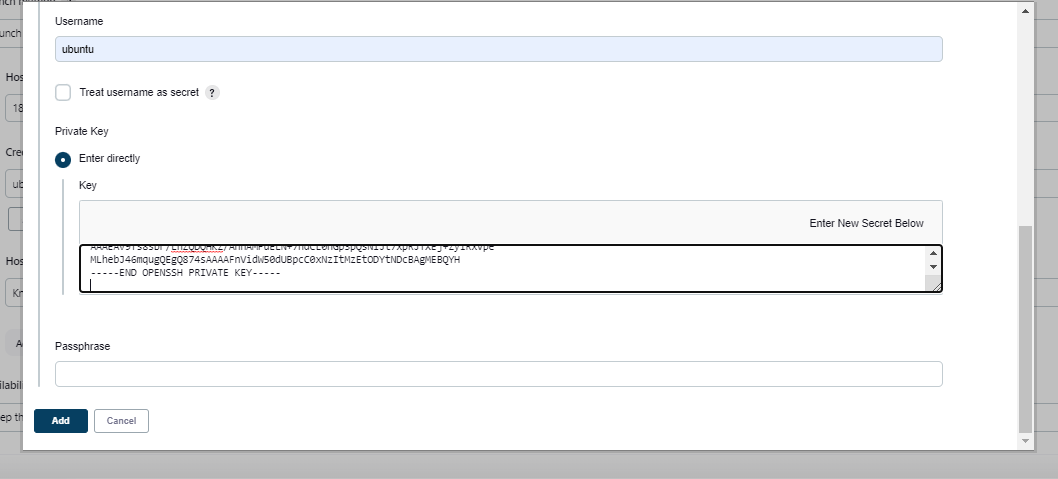
we select ubuntu for credentials.
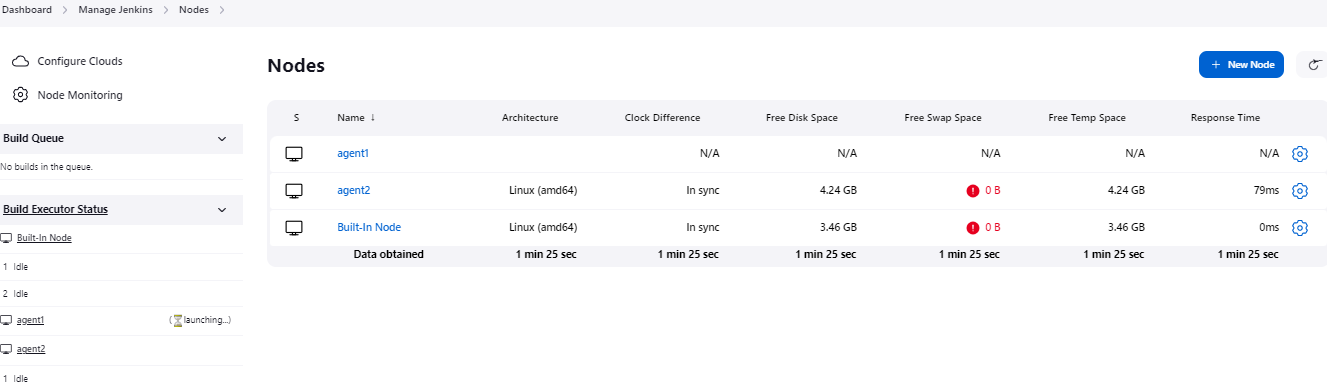
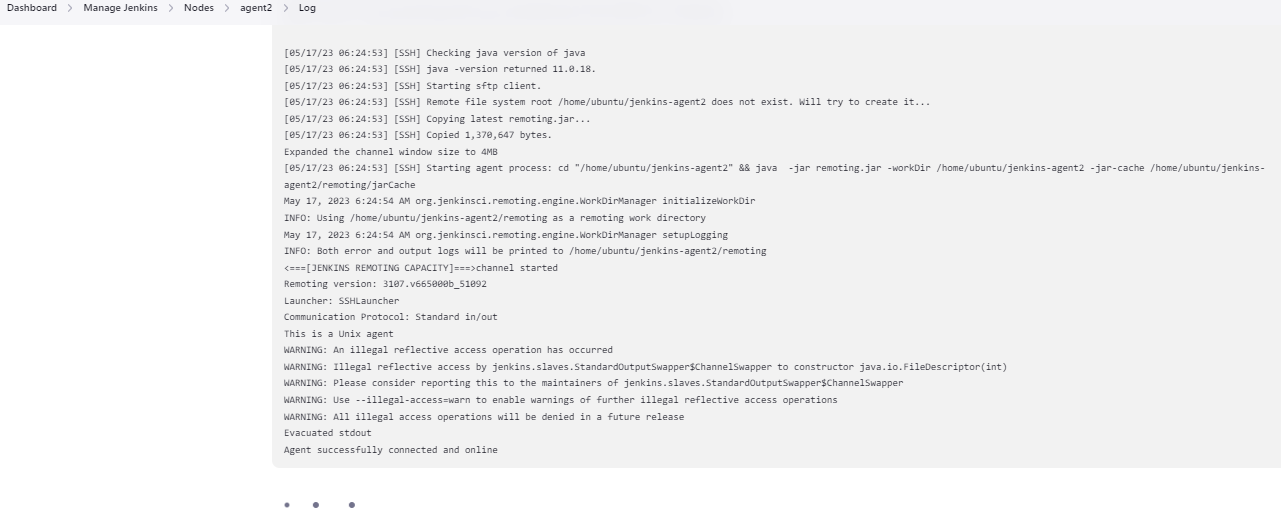
Click on 'save' that will create node. You can see agent will be connected and online.
Your agent is made & launch agent2.
Task-02
Use labels for the agent, your master server should trigger builds for the agent server.
Firstly we will create a freestyle project and would deploy it.
In jenkins, click on “New Item” and enter desired name in “Enter an item name”, select “Pipeline project” and click on Ok.
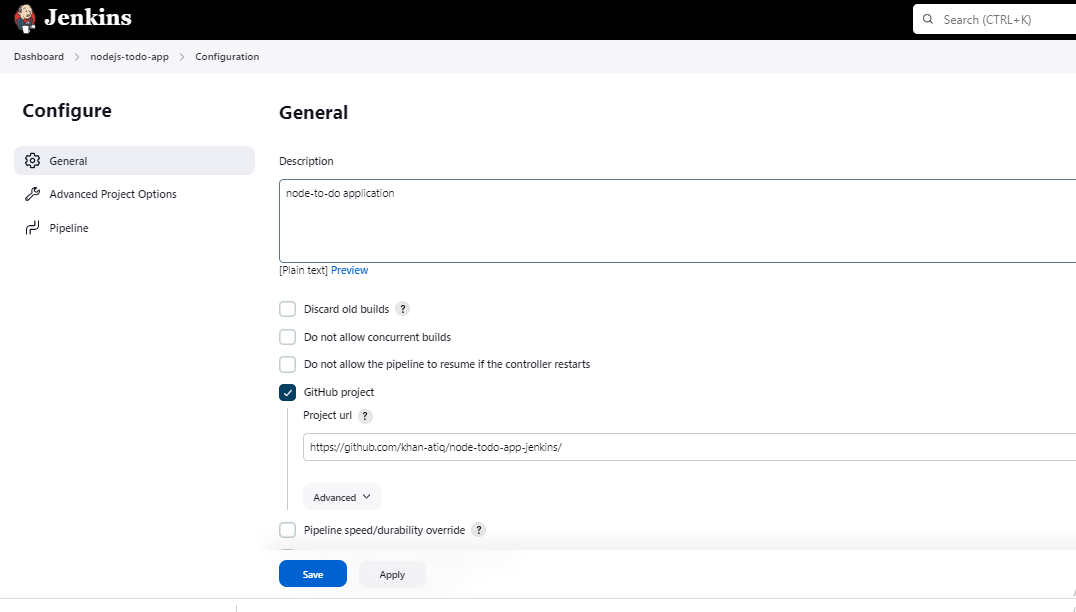
Enter description field. Select “GitHub project” checkbox and enter your repository url from where you will clone all files of your project.
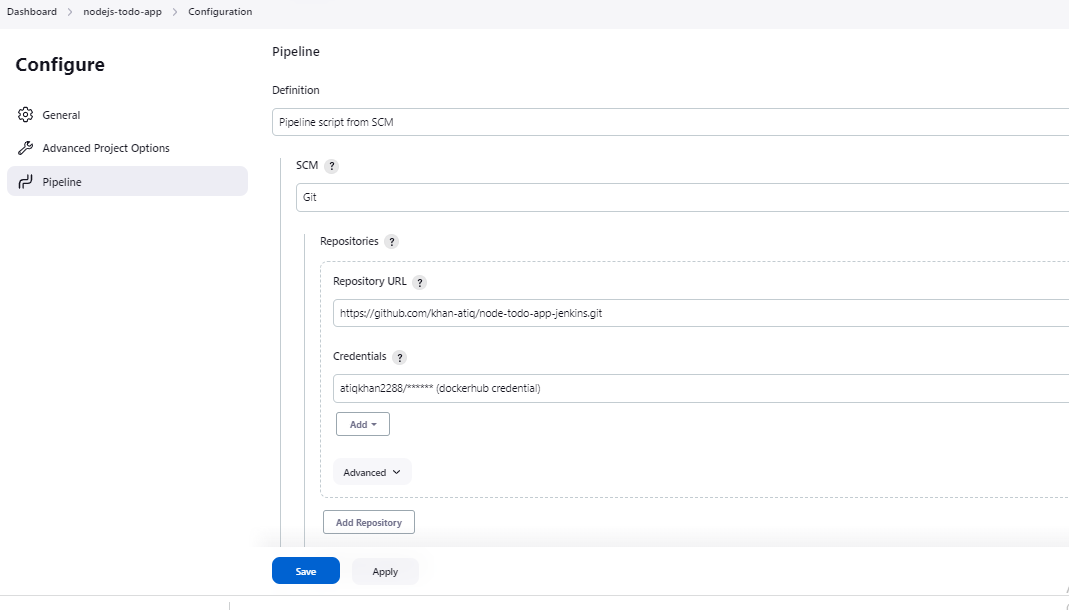
Go to configuration of your job & add dockerhub credentials to push the image for pipeline script.
Add webhook for BUILD

Click on Save, and your project will be tied to Agent2.
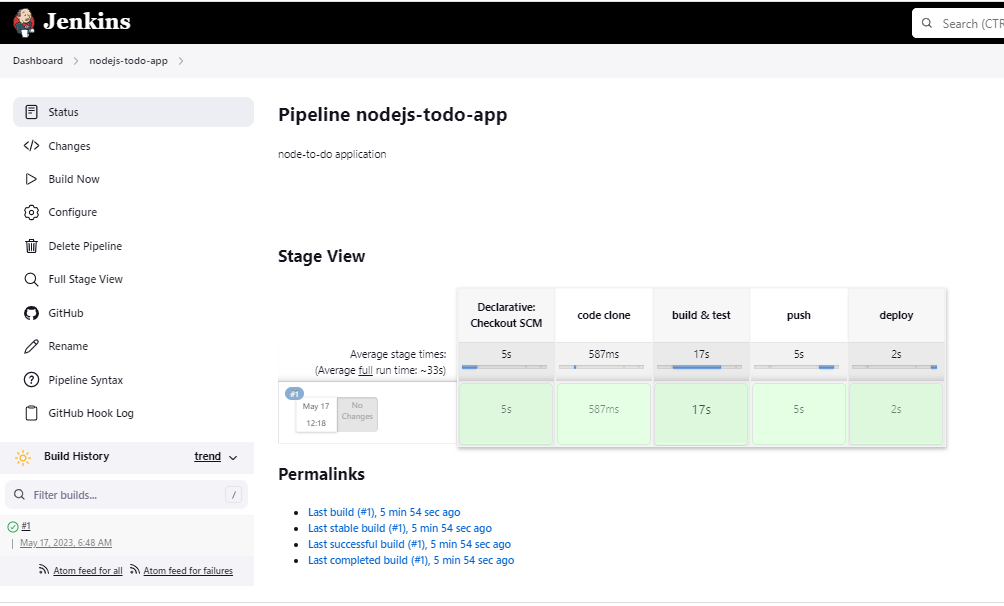
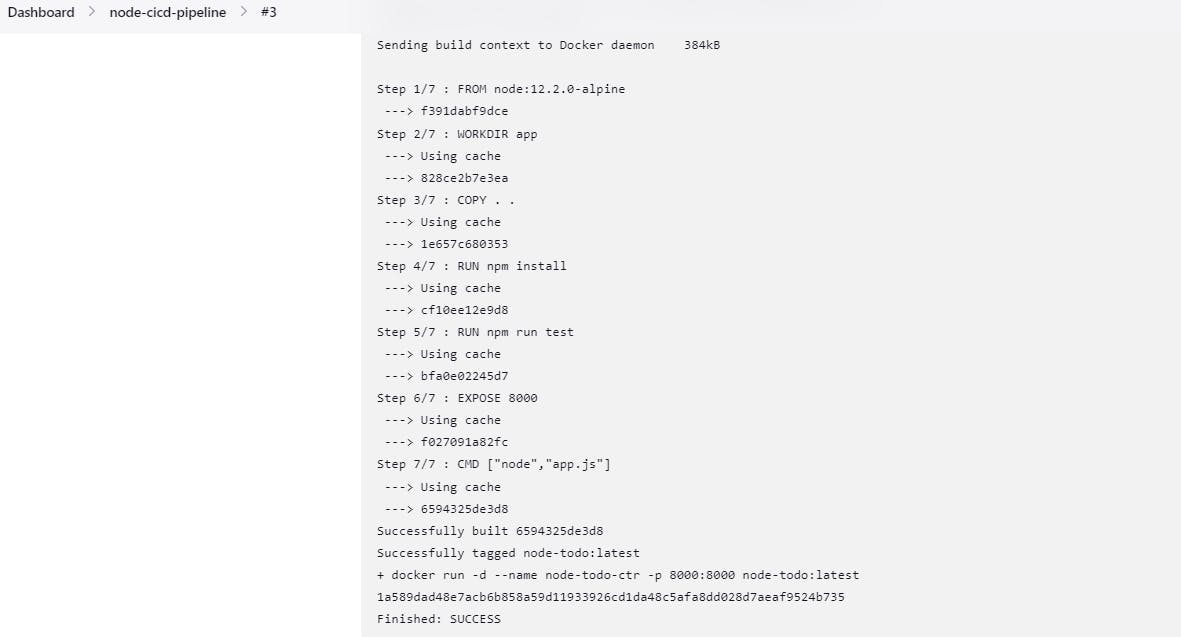
Now, build your project. check console output.

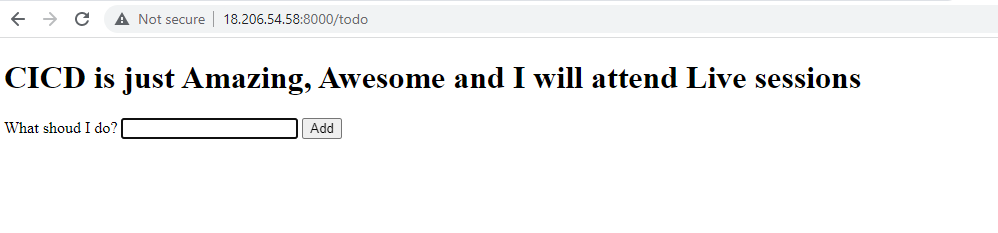
In jenkins-agent EC2 instance, In security group add port 8000.
Now, the web app will be running on “Jenkins-agent” instance and can be accessible via: jenkins-agent-instance-IP:8000
Thank you for reading!
I hope you find this helpful!!


